Slab Leak Water Damage in Kelso, WA
A concealed supply leak can soak flooring without leaving an obvious plumbing drip. Kelso restoration professionals assess wet finishes and slab edges while a plumber locates and corrects the leaking pipe.
(888) 509-1696Address water below the floor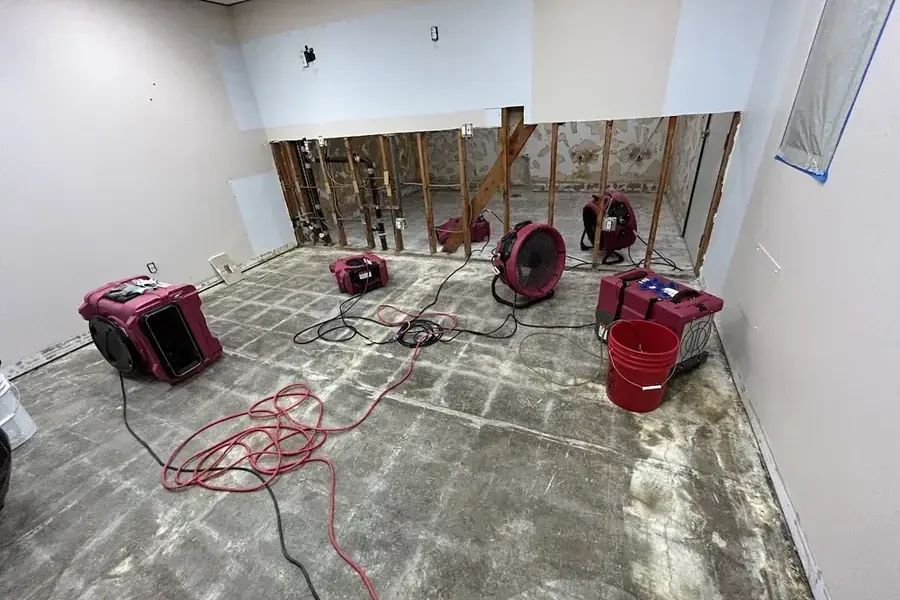
First steps for slab leak water damage
- Check the source safely. A moving meter with all known uses stopped deserves plumbing attention. Close a reachable main valve if a continuing leak is feeding wet rooms.
- Avoid exploratory demolition. Leave drilling and concrete cutting to the appropriate trade. Photograph warm areas, wet seams and lifted flooring without disturbing concealed utilities.
- Preserve repair details. Save the plumber report and source photographs. The restoration contractor uses them alongside material readings to explain the complete loss.
- Keep finishes open. Do not cover a damp slab with new flooring. Coordinate drying clearance and installation requirements before trim, underlayment or finish layers return.
A slab leak is a plumbing source and a building-material problem. Finding the pipe does not dry the floor above it. Restoration technicians establish where liquid escaped, which finishes absorbed it and whether walls or adjoining rooms share the wet assembly.
Separate a supply leak from other water entry
A moving meter with fixtures closed, an unexplained warm floor or recurring dampness can justify plumbing investigation. A plumber uses appropriate testing to locate the failure. The restoration crew records moisture at floor seams, wall bases and any accessible slab edge as the plumber investigates the pipe location.
In West Kelso, a wet floor should not automatically be attributed to the Cowlitz River. Indoor supply leaks and outdoor entry have different histories and contamination concerns. At a building off State Route 4, the contractor starts with the owner’s observations and tests the materials present.
- Record the last time the floor appeared normal and any unexpected water use.
- Identify wet cabinets, baseboards and adjoining rooms, not only the warmest patch.
- Keep the plumber’s test and repair records with the moisture map.
- Check concealed layers before deciding to replace only the visible finish.
Expose the wet assembly carefully
Impermeable coverings can slow moisture release from concrete. Technicians assess whether trim, underlayment or flooring must lift to reach the wet layer. The scope depends on the material, adhesive, contamination and condition. Unnecessary demolition adds expense, while covering a damp slab can damage a new installation.
The drying team manages air conditions and monitors the concrete and nearby wood separately. Dense materials release moisture differently from drywall. Floor-installation requirements may call for specific testing beyond routine restoration meter readings, so the finish contractor should confirm acceptance before rebuilding.
Keep repairs and drying in the right order
Source correction prevents fresh water from feeding the assembly. Extraction and selective access remove recoverable moisture, then dehumidification supports continued drying. The contractor keeps the affected area open as needed until documented goals support the next repair stage.
- Confirm the leaking supply is isolated before a finish repair closes access.
- Track slab moisture and wet wall bases as separate reading locations.
- Protect dry adjoining rooms while flooring or trim comes out.
- Retain final readings and the finish installer’s moisture requirements in the job record.
Do not break concrete or drill into a warm floor to search for a pipe. Concealed electrical circuits, heating components and pressurized plumbing can create hazards. A plumber locates the source, and restoration technicians choose access from the measured damage. Water near electrical equipment requires safe isolation before anyone enters the wet area.
A hidden pipe repair leaves another question: how much of the floor assembly stayed wet? Describe damp seams, lifted finishes and nearby wall stains so the restoration assessment follows the full path of the water.
(888) 509-1696Discuss underfloor water damageWhat does slab leak water damage cost in Kelso, WA?
Slab leak water damage mitigation often ranges from $1,500 to $6,000. Flooring removal, concrete drying and wet wall access drive the restoration cost; leak detection, pipe repair and replacement finishes can be separate charges.
Localized finish damage
$1,500 to $2,500
- Limited floor access
- Slab-edge checks
- Focused drying
Several affected layers
$2,500 to $4,000
- Floor covering removal
- Wall-base assessment
- Repeated moisture readings
Extended saturation
$4,000 to $6,000+
- Broader drying zone
- Dense-material monitoring
- Repair coordination
Estimate only. Water category, affected materials and access determine the scope. Compare the inputs in the water damage cost calculator.
How slab leak water damage progresses
- 1
Locate and isolate
The plumber investigates the supply while restoration personnel document interior moisture, keeping source testing separate from decisions about wet finishes.
- 2
Open the assembly
Technicians remove only the layers required by condition and access, photographing the exposed slab, underlayment and wall edges before drying.
- 3
Track moisture release
The drying team adjusts dehumidification and airflow against repeat readings, checking concrete and adjacent wood rather than relying on room humidity alone.
- 4
Prepare for flooring
The contractor records the drying endpoint and outstanding repair needs, then coordinates the finish installer’s moisture acceptance requirements before new coverings go down.
Related water damage services in Kelso
Slab Leak Water Damage questions in Kelso, WA
Does a warm floor prove a slab leak?
A warm spot is an observation, not a complete diagnosis. Heating systems and other conditions can affect floor temperature. A plumber evaluates pressure and supply use to locate the source, while restoration technicians check whether moisture has reached the finish and wall edges.
Who handles the pipe and the wet flooring?
A plumber locates, repairs or reroutes the damaged supply. Restoration personnel handle affected finishes, extraction and measured drying. The property owner should clarify each scope so a repaired pipe does not leave wet flooring or wall cavities untreated.
Can concrete simply dry beneath the flooring?
Some floor assemblies restrict evaporation and retain moisture. Technicians assess the covering, adhesive and slab condition before choosing access. Dense concrete can need extended controlled drying, and the finish installer may require a specific moisture test before replacing the floor.
Will every tile need removal?
The affected area and assembly determine removal. Moisture may spread beyond the visible stain, but that does not make every tile unsalvageable. The contractor maps the wet boundary, examines the bond and documents which layers need access or replacement.
What should the insurance record include?
Keep the discovery date, meter observations, plumber findings, repair invoice and photographs of exposed layers. Add the restoration moisture map and drying log. Coverage for access, resulting damage and the pipe itself depends on policy terms and the insurer’s decision.
When is it safe to install a new floor?
The slab and adjoining materials need to meet the documented drying goals and the flooring manufacturer’s installation requirements. The restoration contractor and installer should agree on the acceptance test. A surface that feels dry is not enough to approve a new impermeable covering.
Slab leak water damage in Kelso
Coverage includes ZIP 98626, West Kelso, Aldercrest and the Lexington Avenue area. Describe the entry point, affected rooms and safe access when arranging a visit.
Nearby service areas include Longview, Rainier and Ridgefield.
Give the wet slab a measured drying plan
Restoration technicians map the affected floor layers, coordinate source repair and document the moisture conditions needed before finish work begins.
(888) 509-1696Plan the floor-layer assessment